
Solar PV Modules/Panels are Made?
In pandemic time, the solar industry was going down, but in this period people understood that the electricity demand is getting higher day by day, so the bills are. So now people adopting solar more & more day by day. With this, solar panel’s price goes down, it attracts people to move on to solar from the grid.
As we all know that solar system has some components. With the help of all those solar systems converted sunlight into electricity. The solar panel is one of those important components. So, here we will know about:
- Solar PV modules/panels are made?
- What material are involved?
- How different parts are put together in solar panel?
As we all know, the solar panel converts sunlight into electricity. & solar panels made with solar cells. Solar panels are made with silicon solar cells. In these processes, about 20-25 machines are used, in which the solar panel is made through about 8 to 10 steps. So let’s see how a solar panel is made.
Step 1: Cell Cutting
In the process to made solar panels, the very first step is cell cutting. So with the help of a laser cutting machine, silicon cells are cut out. Here, the size of the cell will depend upon the wattage of the panels, that consumers want. If the consumer wants a full-size solar module, there is no need for a cell cutting process.

Step 2: Stringing Process
This step has done with fully automated machines. Here in the machine, the manufacturer using a solar cell of a particular size. Then, these cells are assembled or soldered together. So you can see a different color on both sides. The upper Sun-facing Side is in blue/black color, is the negative part while the bottom is in white, is the positive part.
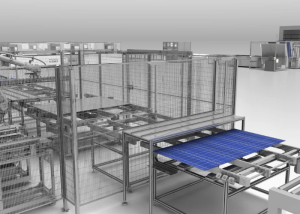
Step 3: Solar Glass
After the cells go through the stringing process, the machine transfers solar cells to tempered glass. which has an ethylene-vinyl acetate (EVA) encapsulation layer over it. So in this process, solar cells are covered by the glass layer.
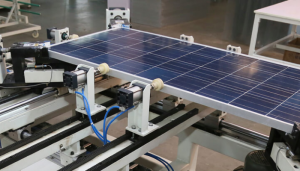
Step 4: Visual Inspection & Taping
In the visual inspection process, the technician examines the solar cells, so that the solar panel could manufacture fault and error-free. After completing the inspection, the technician made the cells into a matrix alignment through taping. So that, panels give a standard output.
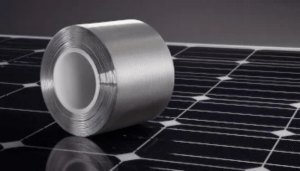
Step 5: Connection & Insulate Module Connection
When the taping process is completed, put all solar cells together & connect them all. If there is any excess material, cut it out. In next step named insulate module connection, consists of insulating the connections by using a back sheet and EVA encapsulation. This process helps the panel to protect from any dust and moisture.
Step 6: Mirror Observation & EL Testing
In the next step, the module is visually checked once again, so that no dust particles, color mismatch remain. This step is called mirror observation. After mirror observation, panels are going through the EL Testing process. This process is known as the electroencephalogram test also. We can say that it is the real testing of the module made so far. It is a test process where the entire module is undergoing a scan by an EI machine. So that, any dead or low power cell, short circuit cells, cracks, etc can easily be spotted. If any such deficiency is found in it, the module is sent back to fix it.
Step 7: Lamination Process & Trimming Back-Sheet
As we can get from the process named, “Lamination Process”, the panel is laminated at 140°C. This is about 20 minutes process. After the lamination is completed, the modules need to be left for 10-15 minutes for cooling down to room temperature. When the laminating process is over, the excess material released from the edges in the back sheet is cut off to make a perfect shape of panels.

Step 8: Frame Cutting, Punching & Sealant Filling
Every panel has a different size, so the frame size varies to the panel’s size. In this step, frames are cut out as per the module’s size. After frame cutting, holes are punched in it for the mounting and grounding purpose. To protect the panels from air, dust, and moisture & help them to firmly attach to the frame, sealant filling done to modules. When the module attaches to the frame, it is sent to the framing machine to check whether it is permanently attached to the frame.

Step 9: Fixing Junction box
The junction box is firmly attached to the panel using a sealant. Only then the connection is soldered. After soldering, the panel is left to dry for 10 to 12 hours. So that it dries well.

Step 10: Module Cleaning & Final Testing
So now the module is cleaned thoroughly so that no dust, excess sealant particles, etc. are left on it. Now module is ready for final testing. In final testing, the module’s output current, voltage, power, etc are checked. A report is created for each module’s output data. A copy of this sheet (with all the details) is attached to the back of the module for users. Finally, the module is sent to the QC Lab for insulation resistance testing. Where 3000 V DC is passed through this panel for one minute. If the panel tolerates that current, it is passed and if unsuccessful, it is sent for a mechanical load test.
How Can We Help?
Hope this information about how solar panels made in India is helpful to you
If you are planning to install a rooftop solar solution, you can connect with Ornate Solar to get the best prices for solar panels. We are the official partner of Canadian Solar panels & Renewsys solar panels in India.
For more information, please give us a call at 011 4353 6666.



Leave A Comment